
SRD Domed light tunnel with a rigid tube
SRD-_ with a rigid light transmitting.
SRD-_/L with a rigid light transmitting tube and attic illumination function.
It ensures easier use of the room located directly under the light tunnel installation site.
The new design of the light tunnel is characterised by:
- design of the ceiling element allowing for installation and operation of the SLO light kit from the room side
- integrated flashing for faster installation process
The SRD light tunnel consists of a dome, three elements of light transmitting tube (SRM 61 cm), two SRK elbows*, ceiling frame, prismatic diffuser and installation kit. The total length of all light transmitting tube components in a straight line is 2.1 m (SRD 550 - 1.8 m).
* For the SRD_ 550 light tunnel, the SRK elbow available only as an option
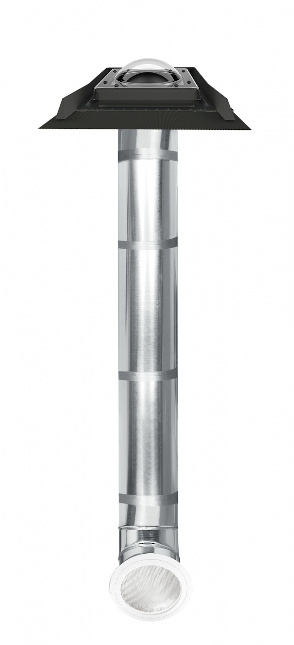
Features
- Rigid light transmitting tube – Made of aluminium and coated with a silver-based reflective layer providing 98% light reflectance. Depending on the model, the recommended maximum light tunnel length is up to 12 metres. There is no need to shorten the light transmitting tube components during assembly as its structure resembles the one of a telescope. It is simply enough to insert one element deeper into another to get the right length.
- Elbow – It changes the angle of the light transmitting tube in the range of 0-45°. For SRD and SRD-_/L 550 models available as an option.
- Roofing element – It consists of a vacuum impregnated wooden frame combined with an aluminium flashing made of 0.6 mm thick sheet metal in RAL 7022 and a UV-resistant dome made of 3 mm thick polycarbonate.
- Ceiling element – It consists of a plastic ceiling frame, white cover and an acrylic diffuser. The new design allows for installation and operation of the SLO light kit from the room side.

Galeria


Instructions and catalogues
Fitting instructions:
Film installation instructions
Product details:


